
How to Prepare your Documents for a Scanning Project
An organization's journey toward digital transformation almost always begins with a document scanning project. Though scanning may sound simple, there are many aspects to planning a high-volume document scanning project.
Once you have decided to digitize your business documents, you will have several decisions to make. Should you perform the scanning in-house with your staff or outsource it to a professional scanning services company? Do you need to scan the documents onsite (at your office), or can you transport them to an offsite scanning facility?
If you have a large number of paper documents in your archives and active working files, you may need to split the project into bite-sized pieces to scan a set number of files every month. You can complement this monthly scanning with day‐forward scanning to keep your paperless initiative going.
In any case, document preparation is an essential first step to ensure that your document scanning project goes well. That's why it's vital to understand how to prepare documents for scanning.
Start digitization the right way: Preparing documents for scanning
Your files are likely arranged in a logical manner in file cabinets or boxes. In the drawers or boxes, your files are organized into file folders that are labeled with information pertaining to the contents of the folders. Inside the folders, documents are separated by staples, paper clips, rubber bands, and other fasteners.
Before you remove a single staple, you need to decide how your documents need to be organized and named once digital. Will they be broken out at the folder level, document level, or at a place inside a file that makes sense for your business? Most companies like to stick with separating at the folder level, but your situation might be different.
This determination means a lot during the prep phase because preppers need to know where to add patch sheets or separator sheets. Patch sheets contain printed patch codes that instruct a scanner or scanning software program to separate documents.
Once you have decided how your files will be separated, the fun and never-mundane work of prepping documents can begin.
Prepare documents for scanning: A comprehensive checklist to streamline your scanning project
Set up a document prep station: You need a large, clean table where you can spread out documents out and organize them. You’ll also need your tools of the trade: patch sheets, scissors, staple removers, letter openers, rubber bands, scotch tape, and gloves. A cart with wheels to move the boxes in and out of the prep area is a big plus.
Start with a patch sheet: Place the first patch sheet face up on the table to indicate the end of the last folder. Then add a patch sheet to mark the end of the last document in the last folder (we use yellow patch sheets to identify folders and pink ones to identify documents within folders).
Remove folders from boxes: Start at the back of the box and work your way forward, one folder at a time.
Remove documents one at a time: Documents can be one or many pages in a folder.
For each document, you’ll need to do the following:
Remove attached objects: Remove paper clips, staples, rubber bands, and sticky notes.
Clean the documents: Ensure that the physical papers are clean and free of dust or dirt, so they do not leave any marks on the scanned documents.
Straighten out pages: Smooth out any wrinkles, creases, and folded corners and flatten them before scanning to ensure every line is accurately captured.
Separate the sheets: Fan through documents to separate sheets that may be sticking to each other to ensure that no sheet is missed out during scanning.
Repair damaged papers: Repair any tears or damage to papers to safeguard the documents while scanning. If they cannot be repaired, identify the damaged pages so they can be evaluated by professional scanning personnel who can recommend the best way to restore the documents before scanning.
Tape down small documents: Records in non-standard sizes, like travel tickets, receipts, and business cards, can be taped to a blank sheet of paper. Tape them to the center of the sheet and always only on one side of the sheet.
Group papers of the same size: Segregate large-sized or odd-sized documents to create a separate batch.
Stack the prepped document face up: After your first document is fully prepped for scanning, place it face up on your patch sheet.
Add a new patch sheet: Add a new patch sheet to denote the beginning of the document and the end of the previous document.
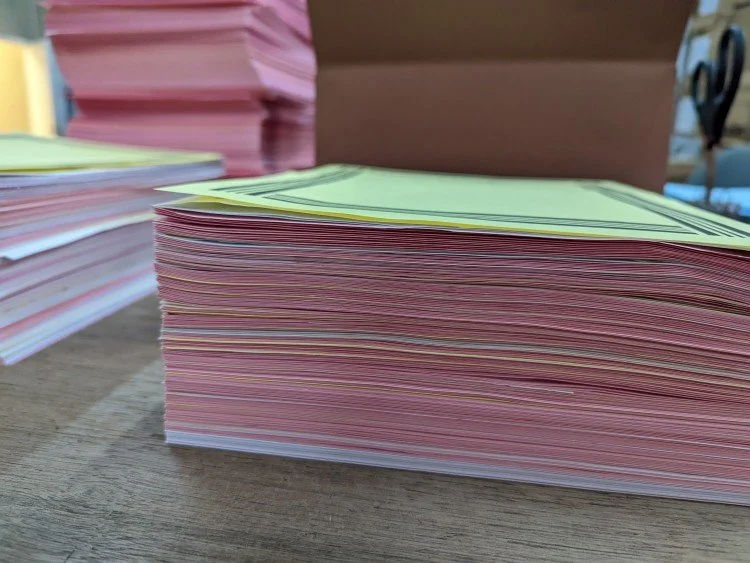
Keep going: Continue prepping your box of documents until you run out of paper. Your freshly prepped documents should look something like the image below.
Stage the documents for scanning: Once your documents are prepped, place them in the designated area for scanning. Be sure to keep them in their original container so they can be re-filed once scanned.
Segregating & organizing documents for scanning
Apart from physically preparing documents for scanning, it's also a good practice to organize and sort through your documents before scanning, rather than re-organizing the files after scanning.
Have your team carefully consider which documents must be scanned first, prioritizing the ones your teams will need quick access to for ongoing work. Sort these into high-priority batches, which can be scanned first.
Organize documents in the correct page number sequences, sorted by their dates, document types, or based on the department. This simple step streamlines the scanning process, makes it more efficient, and enables appropriate document indexing for quick search and retrieval after digitization.
Make a note of which documents can be destroyed after scanning so they can be sent for secure shredding and which ones must be retained in storage.
If prepping documents and readying them for scanning is not reasonably doable for your in-house team, reach out to us. Revolution Data Systems offers a standard document preparation as part of our document scanning service.
RDS prepares your documents for scanning
Our document preparation experts are adept at preparing your documents before scanning them. Reach out to us, and our scanning experts will evaluate your requirements and provide you with a custom quote depending on the amount of prep required for your documents:
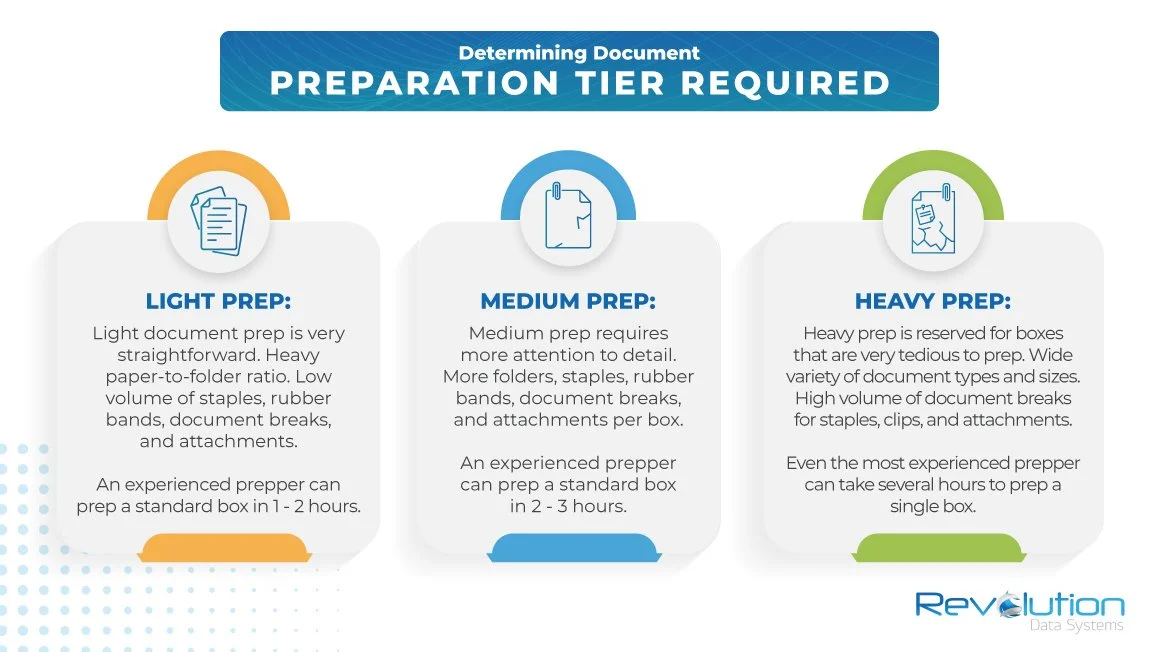
Light prep: Are your documents already 'clean'? Records that do not have many staples, rubber bands, or post-it notes are easier and quicker to prep. All we need to do is remove the pages from respective folders, add separator sheets and share them with the scanner operators.
Medium prep: The more staples, attachments, and document breaks there are in a box of documents, the more time and effort it requires. We have experienced document preppers who handle medium prep projects, which may cost you a little more than light prep.
Heavy prep: If your documents contain many stapled or punched pages with many post-it notes or attachments, we may categorize the job as heavy prep, requiring a significant amount of labor before scanning.
Fragile documents: Aging historical records, worn-out papers, and torn pages require special care—our experts patiently and painstakingly prep such fragile documents for scanning.
Re-prep or re-assemble: Ideally, the originals will be sent for secure shredding after converting physical records to digital format. However, you may need to retain some documents in their original physical formats based on their retention schedules or to comply with regulations. We call this re-prep. Re-prepping or re-assembling is an additional charge.
At RDS, we offer 60-days of free storage of original documents and secure shredding after the storage period so you can avoid the tedious re-prep process.
RDS: Expert document prep and scanning for a range of industries
Document-intensive industries often require bulk scanning services with heavy document preparation. Our experienced scanning team executes document prep and scanning for companies across numerous industries:
Hundreds of organizations rely on us for document preparation, scanning, and document management.
Are you planning a document scanning project? Reach out to us for a custom quote to prepare your documents for scanning. Contact an RDS document scanning expert today!